
Can your dongle do all of this?
PROS: Triple timbre selection with Solid State and Classic/Modern Tube tuning from SE and BAL outputs, distinct sound performance between Solid State and Tube (NuTube) modes, DC-In hyper mode to boost amp output, separate USB IN and Power ports, built-in battery, Bluetooth Wireless support, physical playback control buttons, 3.5mm and 4.4mm PO/LO ports, SPDIF In/Out, chassis magnetic rear panel, and custom leather case with magnetic panel support.
CONS: Shorter battery life depending on mode of operation, small display to navigate through settings, and no app support.
The product was provided to me free of charge for review purposes in exchange for my honest opinion.
The manufacturer’s website: Cayin. It can be purchased from authorized retailers, such as Musicteck and Bloom Audio.
Intro.
As I began writing this review, I paused for a moment to think. How should I refer to this new product from Cayin? Would it still be considered a dongle? It’s not as small as the traditional dongle and has a built-in battery and Wireless connection. Yet, it is more compact and smartphone-friendly than many other portable USB DAC devices with a similar level of functionality. Furthermore, it offers the sound-shaping options typically found in flagship-level DAPs and amps, allowing you to turn your smartphone into one with RU9 magnetically piggybacked.
Cayin is no stranger to pushing the envelope of technology. They were one of the first to introduce a DAP (N8) with dual solid-state and NuTube tonality, and then, being one of the first to introduce a discrete DAC dongle design while scaling down the N6ii’s R2R DAC/amp card to the RU6 level and the N7 1-bit DSD DAC to the RU7 level. Their latest release, RU9, takes it to a whole new level with a portable audio device that I would describe as a hybrid dongle, making it not only compact and MagSafe-ready to carry attached to your smartphone, but also adding NuTube timbre and Bluetooth wireless functionality into the equation.
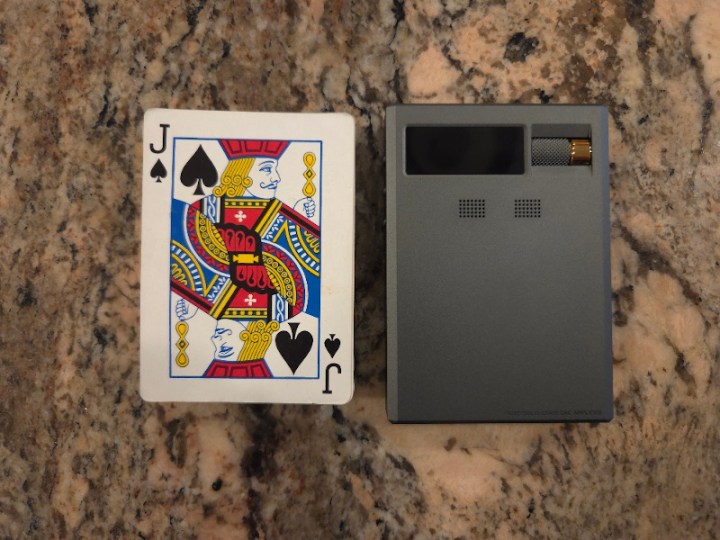
Today, I would like to share with you everything I’ve discovered after spending the last few weeks with the new Cayin RU9 USB/BT/DAC/amp dongle – a Jack of all trades!
Unboxing and Accessories.
RU9 arrived in a surprisingly compact box, featuring modest cover art on the exterior sleeve and an all-black cardboard storage box underneath. Under the cover of the box, RU9 was sitting on the top tray, in a secure foam cutout. Underneath, once the top tray is removed, you will find the accessories and an envelope containing a manual booklet that provides detailed information about the device’s functionality and specifications.


The included accessories are high quality and quite meaningful. The leather case serves not only to protect the device from scratches but also to enhance the MagSafe magnetic attachment. The back of the case has a magnet, while the front of the case has a metal plate. So, when RU9 is inside the case, the magnetic attachment felt stronger when used with my UAG case for the Galaxy S25. The front of the case’s metal plate allowed my small MagSafe battery to be attached to it for RU9 charging with a short USB-C cable. Additionally, Cayin included a magnetic ring that can be attached to a smartphone’s case without a magnetic back or used with a DAP.
RU9 slides from the top of the case, fits tightly and securely inside. The case features a wide opening at the bottom to access all ports, a front panel cutout for the display, volume wheel, and NuTube lights. It also includes covered playback transport buttons on the left and covered power and menu/timbre buttons on the right. The multi-color charging and a sampling rate indicator light on the right side is visible through the case cutout.


Also included were a USB-C to USB-A adapter and a short, flexible USB-C to USB-C right-angle OTG cable. I love this cable and wish I knew where to purchase more. The cable was very flexible, not bulky, and the connector housing was compact and low-profile.

Design.
While RU9 is not as small as a typical dongle, it remains compact, measuring 100mm x 70mm x 15mm, and is relatively lightweight at 150g, which is slightly larger than a deck of cards. It has a solid build and features a CNC-machined unibody metal chassis. I have a regular Galaxy S25 phone, not the Plus or Ultra, which supports wireless charging, and my UAG case already features a built-in magnet similar to MagSafe. Considering the “small” size of my S25, the RU9 width is comparable to the width of the phone’s case and is approximately two-thirds of its length, allowing it to be hidden behind the phone when piggybacked, and doesn’t block the two top lenses of my phone’s camera.


The top of the RU9 features a tinted plastic “window” that ensures the metal chassis around that area does not block the BT antenna. The left side features three equally spaced, identical-sized playback transport buttons with a tactile feel, as well as separate “skip next” and “skip back” buttons, and a play/pause button positioned between them. The right side features a power button at the top, which can turn the power on or off with a long press, and the display on or off with a short press. Then, you have a multicolor indicator LED to show when the device is charging (red) or displaying various colors for different sampling rates.
The menu/timbre button below is used to cycle through Solid State (SS), Classic Tube, and Modern Tube with a single press, or to enter the Settings Menu when you long-press it. When the menu is activated, use the volume knob to scroll through the options, and then press the menu button again to make a selection. The volume wheel is positioned on the front and features a smooth control with a distinct click action at every step as you turn it; however, on a few occasions, it did skip a step. The wheel features a knurled surface with ridges for a better grip as you rotate it with your thumb. To the left of the volume wheel is a 0.96” display, showing various functions, settings, and the playback sampling rate.
At the bottom, you have 4.4mm BAL and 3.5mm SE ports that can be switched between Phone and Line Out. Keep in mind, you can select H/M/L gain for each PO output, and H/M/L output level for LO. Next to it, you have a USB IN port. Then, you have a separate USB-C Power port, indicated in red for easier ID, for charging, and a small BAT/DC toggle switch above it. The S/PDIF digital input and output combined port is located to the right. To charge the internal battery, you must use the USB Power port. Furthermore, when switched to DC Mode and the USB Power port is connected using a compatible adapter, RU9 will switch to Hyper mode, which increases its amplifier operating voltage and output current.
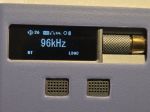
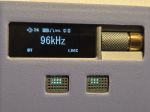
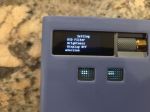
As it was already mentioned, the front of the device features a 0.96” display with adjustable screen brightness, and the volume wheel to the right of it. The display is a bit small for the amount of information, but it’s still clear enough to see everything. For me, it was just a reminder that I’m in denial about needing glasses, lol. However, I hope that in future releases, Cayin will consider implementing a platform that supports an app to control and change settings remotely from your smartphone. Under the display, there are two micro-drilled windows to display the NuTube 6P1 module lights.
The back of the device features a design pattern with grooves to enhance the visual appeal and aid in heat dissipation and airflow. I prefer to use the case to prevent scratches on everything around the RU9 and the device itself. Plus, the case enhances the magnetic connection. However, you can also use RU9 by itself, without the case.


Under the hood.
To start, you have a choice between Bluetooth 5.1 Wireless input, utilizing the Qualcomm QCC5125 chipset (supporting LDAC, aptX HD, adaptive AAC, and SBC), and USB input, featuring the latest XMOS XU316 32-bit processor with support for native DSD512 and PCM 32-bit/768 kHz. For improved compatibility with older devices, including game consoles such as the Nintendo Switch, USB input can be selected to support either UAC 2.0 or driverless UAC 1.0. Audio processing is performed using a dual DAC architecture based on two AK4493SEQ chips, each operating in mono mode to deliver a full-differential output. The left and right channels are decoded separately, thereby reducing crosstalk and improving channel separation.
The amplification part of the circuit following DACs is split into three stages, including the NuTube for timbre enhancement. According to Cayin’s explanation, in Stage 1, they utilize Toshiba 2SK209 audio-grade JFETs as a buffer amplifier. Then, when Tube mode is selected, Stage 2 utilizes NuTube 6P1 to deliver a voltage gain using this module as a voltage amplifier, followed in Stage 3 by more Toshiba 2SK209 JFET transistors as buffer drivers to enhance the output. In my understanding, the Solid-State mode should bypass NuTube voltage gain, using only the op-amps and precision-tuned peripheral circuits.
The Tube mode itself offers two options: Classic and Modern, based on variations in the feedback circuit. This is similar to what has been implemented in C9ii design with both Classic and Modern Tube sound. The Modern sound option utilizes a large-loop negative feedback system, similar to the original C9, which had only one Tube timbre sound mode. In contrast, the Classic sound option doesn’t have this large-loop negative feedback, with each stage operating independently through local feedback, similar to the N8 DAP design.

I have discussed the Korg NuTube 6P1, a dual-channel triode vacuum tube, in my reviews of the N8, C9, N8ii, N30LE, and C9ii. As a recap, while NuTube operates exactly like a triode vacuum tube, the technology behind it is based on vacuum fluorescent display technology, similar to that of an LED. These NuTube modules require less power than traditional vacuum tubes, are smaller in size, and offer significantly higher reliability with a 30,000-hour continuous life expectancy, all while maintaining the sound characteristics of vacuum tube sound. And just like with a vacuum tube, there is a warm-up period; therefore, when switching to tubes in RU9, a 6-second wait time delay is required. Similar to other Cayin products featuring NuTubes, Cayin designed a custom-built shock-absorbing silicone housing and a pin suspension system to eliminate microphonics associated with these tube modules. No ringing is detected when the device is tapped.

I will describe how all these modes translate into sound in the follow-up sections of the review, but here is how they translate into power output. In BAT, when running on battery, you get 310mW @ 32Ω from the 3.5mm SE with a 0.5Ω output impedance. Switching into Hyper mode by connecting the DC input, the output goes up to 420mW. Under the same conditions in BAT mode, you get 620mW @ 32Ω from a 4.4mm BAL with a 1Ω output impedance. Switching into Hyper mode brings BAL output to 1,000mW.
Last, but not least, is the battery operation of RU9. Unlike regular dongles, which draw their power from the source, such as a smartphone, laptop, or tablet, the RU9 has the option to use an internal battery — a 2,000mAh, 3.85V (7.7Wh) LiPo battery. You have three power options: select Audio and Power input, and use RU9 like a traditional dongle, drawing its power from the source through the USB IN port. This will drain the source (smartphone) at an accelerated rate of 390 mA in Solid-State mode and 520 mA in Tube mode. Select Audio only input, and this will allow you to use RU9 with its internal battery without draining the source. But in that mode, 3.5mm output will last you about 4.7hrs in Solid State mode and 3.5hrs in Tube mode, while 4.4mm output will last you about 4.3hrs in Solid State mode and 3.1hrs in Tube mode. The last option is DC IN mode, which produces up to 1W of output power; however, it relies on an external power source rather than the internal battery.
My ideal RU9 setup utilized a Bluetooth Wireless connection, paired with my S25 using the LDAC codec, and an INIU Slim MagSafe portable 45W 10,000mAh battery, connected to the RU9 in DC IN hyper mode. I highly recommend this little battery with a kickstand, not only for the RU9 but also for your smartphone. And, this battery is compatible with the RU9 DC IN mode.


UI.
RU9’s 0.96” display is small, but it packs a lot of info. On the main screen, you will find a volume icon with a volume level, gain selection, PO/LO icon, SS/Tube icon with either ‘C’ or ‘M’ inside the icon to distinguish between Classic and Modern, and a battery level indicator; however, no percentage is displayed. The sampling rate is displayed in a larger font below, and below that, you will see the type of connection.

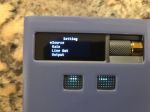
To access settings, press and hold the Menu/Timbre buttons for a few seconds, and then use the volume wheel to navigate through the settings. The menu button is used to select options under each setting.
These Settings are: Source (USB, BT, S/PDIF), Gain (H/M/L), Line Out (H/M/L), Output (PO, LO, S/PDIF), USB Audio Class (UAC 1.0, UAC 2.0), USB In (Audio Only, Audio and Power), Idle Shutdown (on/off), PCM Filter (sharp/slow/SD sharp/SD slow/super slow/low dispersion), DSD Filter (narrow/wide), Brightness (H/M/L), Display Off (never/10s/20s/30s/40s/50s/60s), and Version (fw version).
As already mentioned, I would have loved to see an app that supports changing these options from my smartphone, but the current platform of RU9, as well as RU6 and RU7, doesn’t support it. I hope Cayin will consider app support in their future dongle and hybrid-dongle releases.

Page 2 – Sound analysis, Comparison.
Page 3 – Pairing, Wired/Wireless Connection, and Conclusion.

Very nice review.
It would be also interesting, to compare it with the N30LE instead of the N8ii. 🙂
LikeLike
Yes, I agree. Can you please send me N30LE so I can compare it? 😉
LikeLike